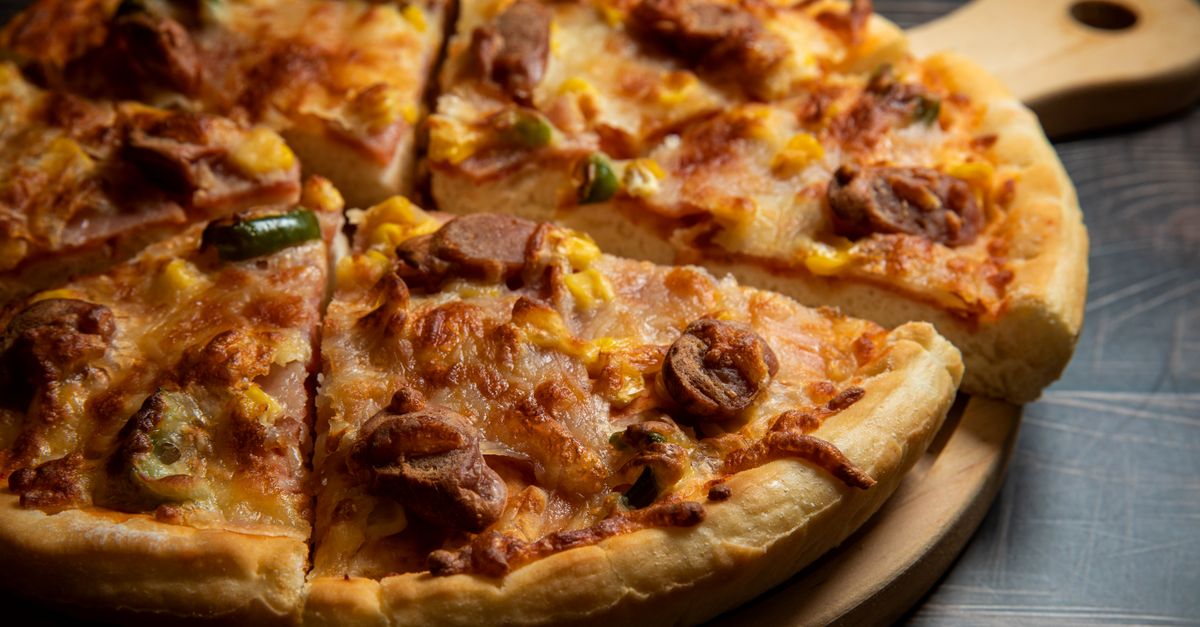
Why Your Homemade Pizza Crust Isn't Crispy (And The Pro Secrets That Deliver Pizzeria-Quality Crunch Every Time)
You’ve spent the afternoon carefully kneading dough, layering your favorite toppings, and anticipating that perfect homemade pizza night. But when it emerges from the oven, there’s a familiar disappointment: a limp, chewy crust that bends under the weight of the cheese and sauce. You wanted that satisfying crunch—the kind you get from your favorite pizzeria—but instead, you’re left with a soft, underwhelming base. In my experience, this isn’t just a minor flaw; it’s the difference between a good pizza and a truly great one. Many home cooks resign themselves to a less-than-crispy crust, blaming their home oven or a lack of fancy equipment. But I’m here to tell you that achieving a truly crispy, airy pizza crust at home is absolutely within reach, and it has far less to do with expensive tools and much more to do with understanding a few fundamental principles that most people completely miss.
Key Takeaways
- Prioritize high heat and thermal mass to rapidly cook the crust, mimicking professional pizza ovens.
- Ensure proper dough hydration and a strong gluten network for an airy interior that crisps effectively.
- Use a minimal, carefully balanced amount of sauce and toppings to prevent excess moisture from steaming the crust.
- Pre-bake the crust briefly or use strategic oiling to create an initial barrier against moisture.
The High Heat, Fast Cook Imperative (Most People Underestimate This)
The single biggest mistake I see home pizza makers make is underestimating the power of high heat and rapid cooking. A professional pizza oven can reach temperatures upwards of 800-900°F (425-480°C) and cook a pizza in 90 seconds. Your home oven simply can’t compete with that sheer intensity, but you can simulate the effect by maximizing the thermal mass inside your oven. This means giving your pizza a super-hot surface to cook on, rather than just placing it on a cold baking sheet.
What changed everything for me was investing in a pizza steel or thick pizza stone. I use a 3/8-inch thick pizza steel, which weighs a hefty 18 pounds. Unlike a thin baking sheet or a cheap, porous stone, a steel retains an incredible amount of heat. I preheat it in my oven at the highest possible temperature (usually 550°F or 290°C) for a full hour, sometimes even 90 minutes. This isn’t just about reaching the set temperature; it’s about saturating the steel with enough heat energy that when your raw dough hits it, there’s an immediate, intense burst of heat transfer. This high-temperature shock causes the exterior of the crust to crisp almost instantly, while the interior rapidly puffs up, creating those desirable airy pockets. Without this thermal mass, your crust slowly heats up, drying out rather than crisping, and often becomes tough and chewy.
Dough Hydration and Gluten: The Foundation of Crispness
A truly crispy crust needs an airy, open crumb structure inside. This means your dough needs to be well-hydrated and have a strong gluten network. Many recipes call for a lower hydration dough (around 60-65% water to flour), which can be easier to handle but often results in a denser, chewier crust. For that light, airy, crispy result, I aim for a 68-72% hydration dough. Yes, it’s stickier and a bit more challenging to work with, but the payoff is immense.
The extra water turns into steam during the high-heat bake, creating those beautiful bubbles and an open crumb. Coupled with proper kneading (or a long, slow fermentation for no-knead doughs), this develops strong gluten. The gluten acts like a scaffold, trapping the steam and allowing the dough to puff up rapidly. The mistake I see most often is people not developing enough gluten, leading to a dough that can’t hold its shape or rise properly, resulting in a flat, dense crust that has no chance of crisping. A simple stretch and fold technique every 30-60 minutes during bulk fermentation can dramatically improve gluten development without the need for intense kneading.
The Moisture Management Masterclass: Less is More with Toppings
Think of your pizza crust as a delicate, hot surface. Any excess moisture will turn that crisp surface into a steamy, soggy mess. This is where mastering moisture management comes in. The most common culprits are watery sauces and overloaded toppings.
First, use a dense, concentrated pizza sauce. If you’re using canned crushed tomatoes, simmer them down by about 25-30% before applying. This reduces the water content dramatically. I often use San Marzano tomatoes, lightly crushed by hand, with minimal additional liquid. Crucially, I never apply sauce all the way to the edge of the dough. Leave a 1/2 to 3/4-inch border of bare crust. This dry edge will brown and crisp up beautifully, giving you that satisfying crunchy rim that’s often the first thing people bite into.
Second, be judicious with your toppings. This is where many home cooks go wrong. We want to pile on all our favorites, but a heavy, watery load of toppings will release steam, essentially steaming your crust instead of baking it. Think lighter: a smaller amount of high-quality cheese (low-moisture mozzarella is key), thinly sliced vegetables (blot excess water from mushrooms or bell peppers if needed), and lean meats. If I’m using a particularly wet topping like fresh mozzarella, I’ll often blot it dry with a paper towel before placing it on the pizza. This might seem extreme, but it prevents those watery spots that guarantee a soggy bite.
The Strategic Pre-Bake or Oil Barrier (A Game Changer for Many)
Sometimes, even with all the above, you might still battle a slightly softer center, especially if you prefer a thicker crust or have juicier toppings. This is where a strategic pre-bake or an oil barrier can make a huge difference.
For a truly bulletproof crispy crust, consider a short par-bake (or blind bake) of your dough. After shaping the dough, transfer it to your preheated pizza steel/stone (using a peel dusted with semolina flour for easy transfer). Bake the bare crust for 2-3 minutes, until it’s just set and starting to puff. Remove it from the oven, quickly add your sauce and toppings, and then return it for the main bake. This initial high-heat blast gives the dough a head start, setting its structure and creating a firmer base before the weight and moisture of the toppings are introduced.
Alternatively, a less intensive but still effective method is to brush the exposed crust (the border you left sauce-free) with a thin layer of olive oil. The olive oil helps the crust brown and crisp, creating a beautiful golden edge that’s resistant to moisture. For those who want an extra crispy bottom, some experienced pizzaiolos will even lightly brush the bottom of the stretched dough with olive oil just before transferring it to the hot surface, creating an oil barrier that enhances crisping and prevents sticking. Just be careful not to use too much, as it can make the crust greasy.
The Post-Bake Rest and Cooling Rack (Don’t Skip This!)
Your pizza isn’t done when it comes out of the oven. This final, often overlooked step is critical for maintaining crispness. When your pizza first emerges, it’s still very hot, and steam continues to escape from the underside. If you leave it on a solid surface like a cutting board or a plate, that steam will condense, making the bottom of your crust soggy right before your eyes.
The simple solution is to immediately transfer your baked pizza to a wire cooling rack. This allows air to circulate around the entire pizza, including the bottom crust, letting the steam escape and ensuring that coveted crispness holds. I let my pizza rest on the rack for at least 3-5 minutes before slicing and serving. This resting period also allows the cheese and toppings to set slightly, preventing them from sliding off when you cut into it. It’s a small detail that makes a monumental difference in the final texture and enjoyment of your homemade pizza.
Troubleshooting Common Pitfalls
Even with these strategies, you might encounter issues. Here’s how I approach common problems:
- Crust is burnt on top, raw on bottom: Your pizza steel/stone might not be hot enough, or your oven’s top element is too strong. Try moving the steel to a lower rack (second to bottom is usually ideal) and extending the preheating time. You can also experiment with putting the pizza steel in the lower third of the oven for 3/4 of the bake, then quickly moving it to the top third for the last minute or two to brown the top if needed.
- Crust is too tough/chewy: This usually points to either too low hydration dough or underdeveloped gluten. Increase water slightly in your next batch (e.g., from 65% to 68%) and ensure you’re getting adequate kneading or stretch and folds during fermentation.
- Toppings are sliding off: Your sauce might be too watery or you’re overloading the pizza. Blot wet toppings, reduce sauce, and ensure cheese is low-moisture.
- Difficulty transferring pizza to the hot steel: You need a well-floured pizza peel. I swear by semolina flour for dusting the peel; its coarser texture acts like tiny ball bearings, making the pizza slide off effortlessly. Make sure your shaped dough isn’t sitting on the peel for too long (no more than 5-7 minutes) once topped, or it will stick.
Achieving that perfect, crispy homemade pizza crust is a journey of understanding and refining. It’s not about magic, but rather applying these core principles consistently. Once you experience that satisfying crunch, you’ll never look back.
Frequently Asked Questions
What is a pizza steel, and do I really need one?
A pizza steel is a thick slab of steel (usually 1/4 to 1/2 inch thick) that you preheat in your oven to extremely high temperatures. It absorbs and retains heat much better than a traditional pizza stone, transferring intense heat to your dough rapidly, which is crucial for a crispy crust. While not strictly
Written by Sarah Chen
Home Organization & Sustainable Living
A former community organizer, Sarah brings a passion for connecting people with practical solutions.
You Might Also Like

Why Most Meal Delivery Services Fail You (And What Actually Works for Effortless Eating)
Discover why meal delivery services often disappoint and learn the counter-intuitive strategies that deliver genuinely effortless, delicious meals.

Why Your Home Humidifier Isn't Working (And The Simple Fixes Most People Miss)
Discover why your humidifier isn't working and common mistakes. Learn simple, effective fixes for consistent home comfort and better air quality.
Why Your Home Humidifier Isn't Working (And The Simple Fixes Most People Miss)
Troubleshooting your humidifier? Learn common reasons for malfunction and simple, non-obvious fixes to restore optimal performance and comfort.